Hello and welcome to Home Movies Tuesday! If you’ve found your way over by some miracle but are not yet subscribed, here, let me help you with that:
Last year I tried desperately to make a chickpea salad with chickpeas straight from the can. I added herbs and lemon, grated garlic and scallions, then tried versions with preserved lemon and sumac, I did a toasted garlic oil with chili, I used vinegar instead of lemon. I added cheese (different kinds), and in one iteration, chopped raw onions and cucumber for Greek Salad/Chopped Salad vibes. I did a bunch of other stuff too, I won’t bore you with the details. I hated each one.
Even after long periods of marination, I couldn’t get over the fact that I was eating a spoonful of raw* chickpeas, and for whatever reason, that made me unbelievably sad. Unlike a bean from a can, which can be marinated into palatable submission, the tinned chickpea stays kind of chalky, starchy and despite an onslaught of external flavor, always kind of gives “eh.” They are not the chickpeas I know and love from simmering into soups or stews, or the ones I make from dried little chickpeas, tenderly cooked in pots of broth made from leftover onions, halved lemons and bay leaves (which I promise DO do something, if you let them).
*raw as in, raw from the can– canned chickpeas are, of course, cooked.
The anti-raw-chickpea revolution really came to me when I was eating the famous chopped salad at a fabulous ladies lunch with my friend Hunter at La Scala. We got it because Bethenny said to, but all I could think of the whole time was why was I eating a chickpea straight from the can. Clearly I’m in the minority since the salad is, in fact, famous.
Regardless, after that otherwise delightful lunch I resigned to the fact that if I was going to make a salad with chickpeas, the chickpeas had to be cooked. Not crispy (an opinion for another time), but simmered till softer or mushier, but just….not from a can. They just had to be. What I really wanted, was frizzled chickpeas, salad-ified*.
*I know we mostly think of our salads as “entirely uncooked,” and when they do involve a step of cooking people tend to freak— So sue me! A salad is a state of mind. I could also see the chopped salad comparison being exciting to some, and lead you to think this might be that, so let me say this is not that. Instead, this is a great herby all-purpose summery salad, meant to be on every table, eclipsing the main event, even if “accidentally”. Who is she? Where is she going? What’s a hot dog? I must have more of that chickpea salad.
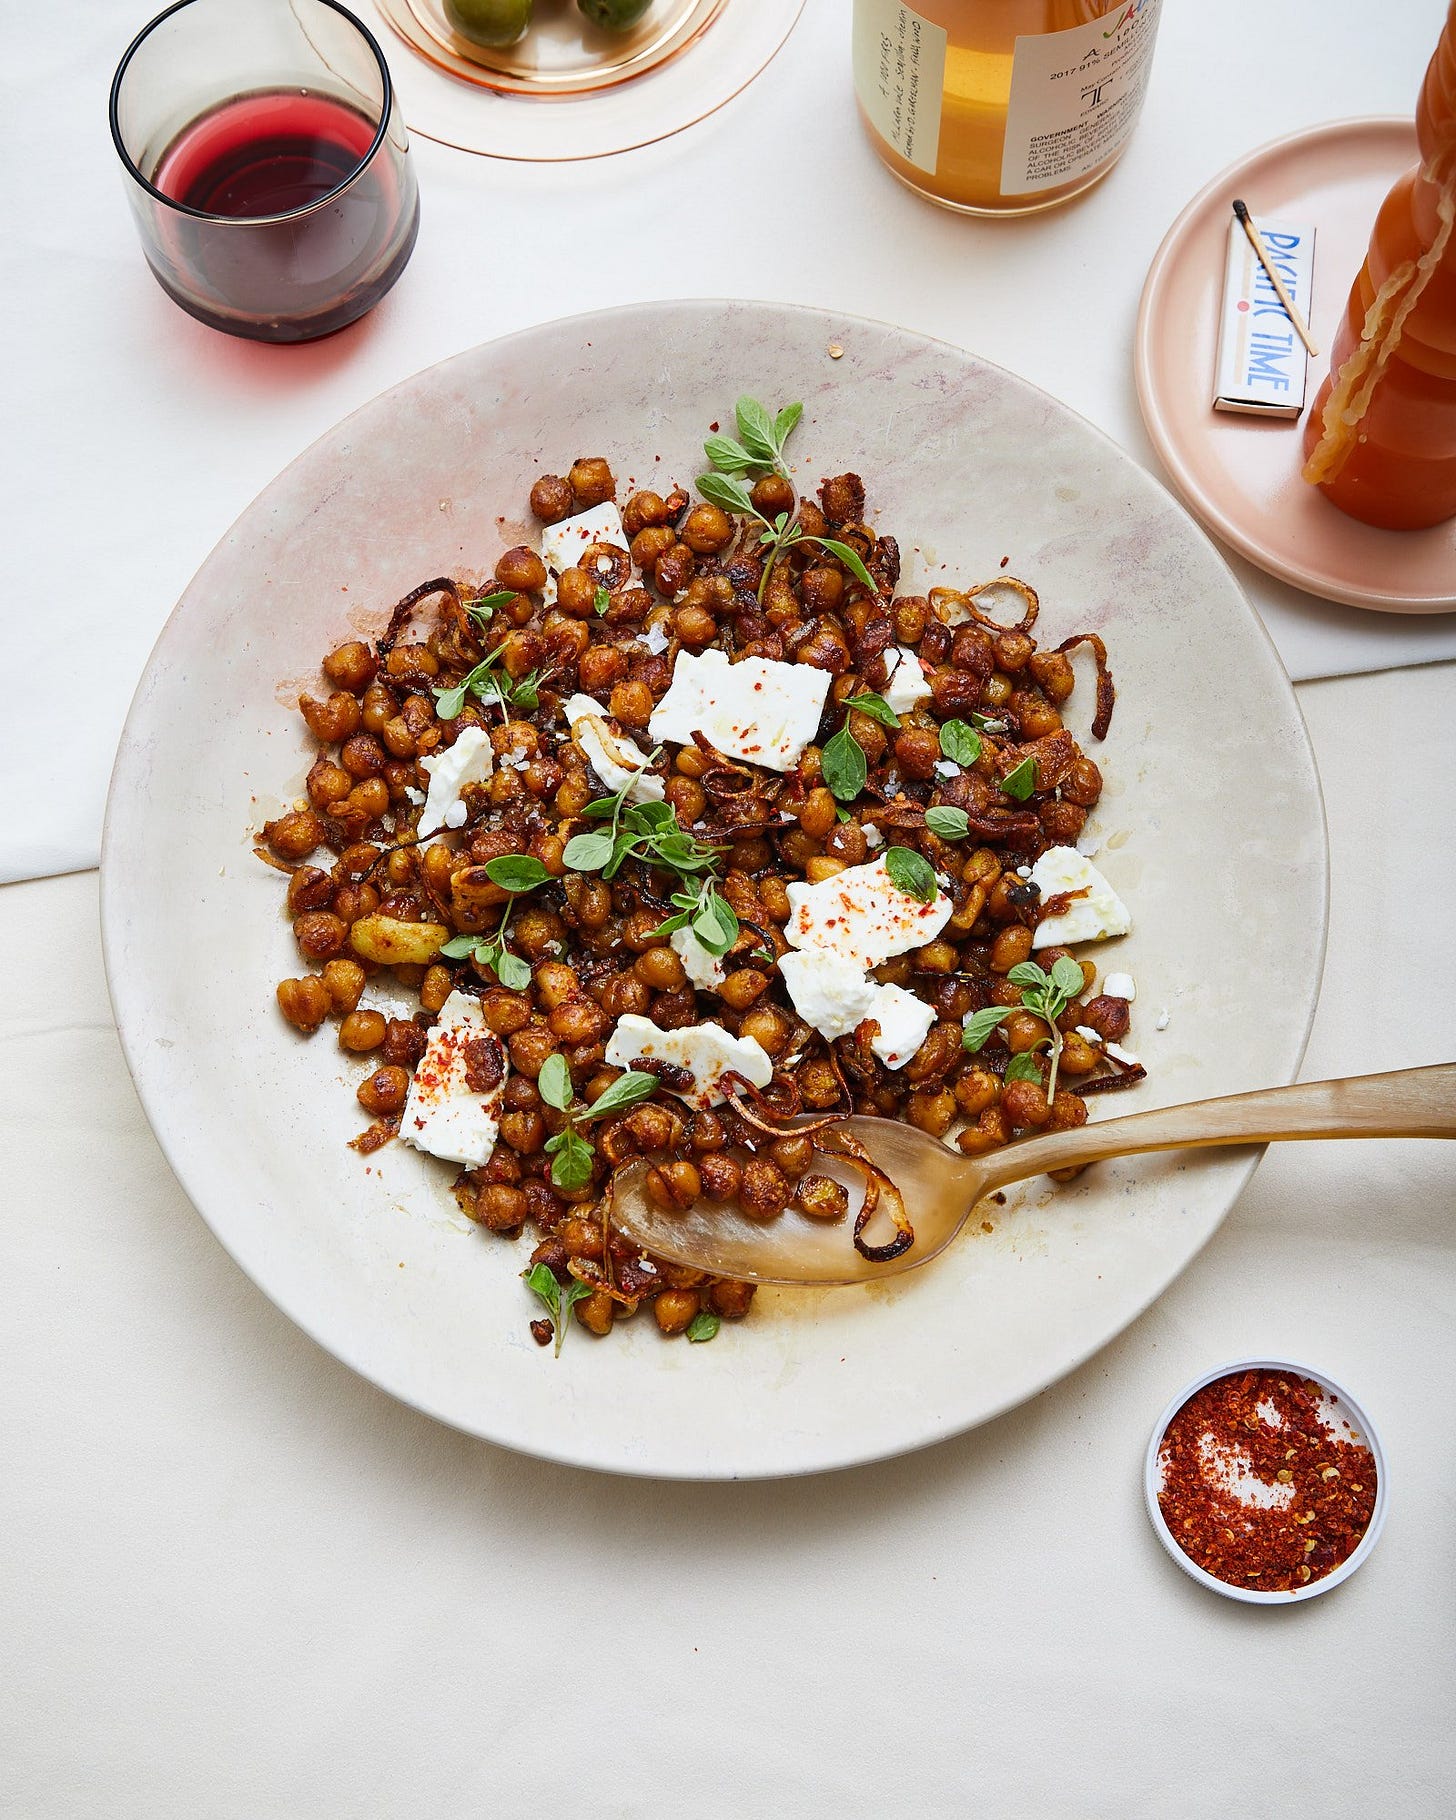
It’s another step, sure– and “cooking” is a thing we purport to “hate” doing in the summer (but unavoidable!)– but I promise that the extra effort of frizzling (sautéing over high-ish heat with plenty of olive oil and salt) will reward you greatly. The frizzle does not crisp (these are NOT supposed to be crispy!), but lightly fries and…frizzles the exterior skin of the chickpea, giving it a toasty, golden brown color, delightful texture (still creamy on the inside with some structure to the outside) and a deeper, more savory flavor. If a chickpea from the can is a piece of stale white bread from the grocery store (useful for some things, but not great on its own), this chickpea is a gorgeous piece of buttered toast made from the nice bread you aren’t sure is worth it but you still keep buying anyway.
First seen as a more fall type of side in Nothing Fancy, the frizzled chickpea has become my go-to for summer salads as well. Keep the onions, loose the feta (or keep it, if you like), and add an absolute abundance of herbs. Parsley, dill, mint, cilantro, keeping each one Leafy. Spriggy. Coarse. Lemon to finish if you like (though this is a rare occurrence where they don’t actually *need* lemon to feel complete, I just really love lemon).
This is a pretty straightforward recipe, but one comment I have heard is that sometimes people worry the chickpeas get darker before frizzling. So, if your chickpeas are getting darker without frizzling, you have two options (or rather, I have two suggestions): turn your heat down (honey, every stove’s medium–high is another stove’s high!), or add more olive oil. My instinct is to add more oil almost every time (even if the heat is too high), since they’ll start to sort of shallow-fry, the next step after frizzle, which is preferable to burning.
Frizzled Chickpea Salad
serves 4-6
“Frizzled” might not seem like a real word but I promise it is, and once you cook these onions with these chickpeas, you’ll understand there is no other way to describe them. Not quite fried, not quite caramelized, they sizzle and crisp and caramelize in a good amount of olive oil along with smashed garlic, resulting in what can only be described as frizzled.
This is good once you stop there, but adding fresh herbs makes this a truly dreamy dish that I have eaten as my main meal more than once, nuzzled up next to a very runny, crispy-edged fried egg, roasted chicken, or in between bites of a hot dog. Add cheese or yogurt if you like, but these chickpeas can truly hold their own without.
INGREDIENTS
1⁄2 cup olive oil
1 large red or yellow onion, thinly sliced
Kosher salt and freshly ground black pepper
2 (15-ounce) cans chickpeas, drained and rinsed
4 garlic cloves, smashed
Pinch of crushed red pepper flakes
2 cups mixed fresh herbs (leaves and tender stems), such as parsley, cilantro, dill or mint (the bulk of which should be parsley and/or cilantro)
2 tablespoons marjoram or oregano leaves (optional)
2 ounces feta, very thinly sliced or crumbled; or 1 cup seasoned Greek yogurt or labne, for serving (all optional)
Lemon wedges, for serving (optional)
1. Heat the olive oil in a large skillet over medium-high heat. Add the onion and season with salt and pepper. Cook, stirring occasionally, until the onion has softened, and is just starting to brown, 5 to 8 minutes.
2. Add the chickpeas, garlic, and red pepper flakes. Season with salt and pepper and toss to coat in the oily business. Continue to cook, shaking the skillet occasionally to make sure nothing is sticking and that the chickpeas are getting equal attention from the oil and heat, until the chickpeas are golden brown and appear fried around the edges and the onion is a deep golden brown and looks somewhere between fried and caramelized, a term we now call “frizzled,” 12 to 15 minutes.
3. Taste a chickpea or two and make sure it’s plenty seasoned, adding salt, pepper, and/or a pinch of red pepper flakes, if you like things on the spicier side.
4. Remove from the heat and transfer to a large serving bowl. Top chickpeas with all the herbs. If using, serve with feta or yogurt, as well as lemon wedges for squeezing over.
DO AHEAD: Chickpeas can be made a few hours ahead, kept covered loosely at room temperature. Feel free to reheat in a skillet over medium-high heat before serving, as they’ll lose a bit of their crispness as they sit.


Can I make this and keep it as leftovers for a few days? I cook solo and like to get a few meals out of my prep time.
Hi I avoid every recipe with chickpeas in them after trying and realizing I love beans and hate chickpeas.I knew there was a reason I like you beyond the obvious. But this one frizzled I will try...the photo is enough to convince me!