Hello and welcome to Home Movies WEDNESDAY! If you’ve found your way over by some miracle but are not yet subscribed, here, let me help you with that:
The question “are you a pie person or a cake person” has always confused me since both are so different I can’t imagine anyone actually feeling like they have to choose. AND YET. I am...a pie person. Well, I’m a fruit person, and pie is absolutely about fruit, so.
Anyway, I have always loved pie because pie (especially when compared directly to cake) is decidedly more flexible and has the potential to embody the exact kind of chaos I love about dessert. The making of it always feels closer to cooking than baking, leaving room for more adjustments, liberties and creativity.
While this isn’t the only way to make pie (or pie crust), I really do love this way. The crust is my pride and joy and I find the ratios for the filling in this specific recipe (best used with other stone fruit) is pretty fool-proof, even with out of season stuff. This video/recipe will clear up a few things if you’ve got specific questions (what should your dough look like? How long do you really have to bake it for?) but also give you permission to loosen up with regards to pie perfection. The juices will escape! The slices might collapse! The decoration you spent hours on might not show up after it’s baked! LIFE!
Hopefully we’ve covered it all in this one, but tomorrow, we’re releasing a Pie Q+A with some of your most frequently asked pie questions, so please *tune in*! —AR
ICYMI:
Chef’s Kiss (a bi-weekly advice column for paid subscribers featuring equipment Q+A, mini-recipes and FEELINGS. To ask a question, head here)
Grilled Corn and Scallion Salad
Welcome to a very special (Wednesday) edition of Home Movies where we go to pie school, make pie and have endless amounts of fun. Class is now in session! While I highly suggest making the pie from the episode (it’s a double-crust peach pie with honey, ginger, and lime and it’s absolutely in my pie hall of fame), you can take the lessons here and really apply them to any pie you want to make, from the crust to the filling to the baking. Making a pie from scratch can feel daunting, but it can also be meditative, highly rewarding, and very delicious. We’re here to set you up for success in all your future pie-making endeavors.
Pie 101 is all about how to make an excellent pie, broken down into four important parts:
the crust
People go back and forth all the time on the best pie crust, but this is really the only one I ever use. It’s perfect, neutral in flavor so it works for sweet or savory applications, and this section of the video is super helpful in demonstrating how to avoid overworking your dough, the importance of using cold butter, why it’s better to use your hands, and why you need to chill the dough.
the filling
The peach filling with honey, ginger, and lime hits all the marks for me, taking advantage of the summer peaches popping up right now (a true delight). The additional acidity keeps it from being *too sweet*, and since they’re cut on the thicker side, the peach slices retain some texture, preventing a jammy mess. Of course, as always, no peaches, no problem. You can use the basic formula of thickener + sweetener + acid + stone fruit to make your personal pie dreams come true.
the assembly
When you’re assembling the pie, really get your station organized and give yourself the space to put it all together. Here you’ll learn the basics of rolling out the dough and transferring it to the pie dish without it sticking or breaking, how much to fill your pie to account for shrinkage, how to seal and crimp the edges, why you don’t need to put so much pressure on the appearance of the pie, and how to handle the inevitable spillage in the oven (aluminum foil-lined baking sheet!!).
the baking
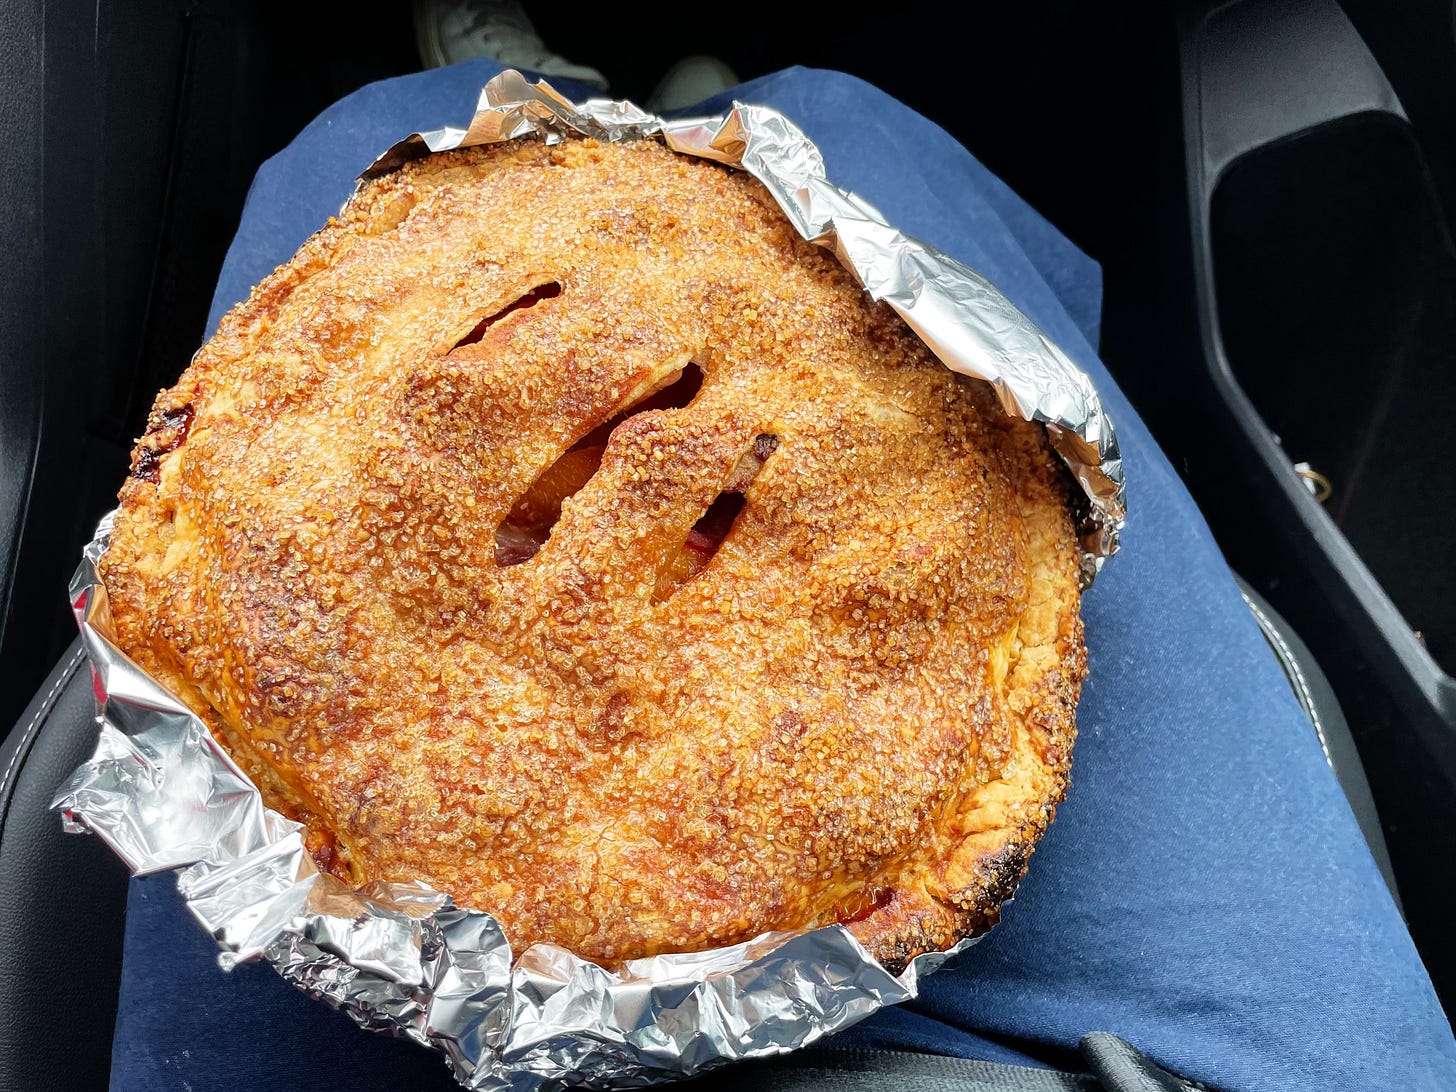
Pies take longer to bake than you think, I guarantee it! This one takes two hours, and yours probably will too. This is absolutely the biggest takeaway from Pie 101, and as you graduate and go out into the world, please carry this lesson with you. Don’t underbake your pie! The color of the crust should be that of a well-baked deeply golden croissant. And then… you need to wait a while before slicing into it to avoid a runny goopy mess. You’ve come this far: don’t rush the process now. We’re talking at least 4 hours here, but really 6-8 or even overnight is preferable. Normalize pie being room temp, or even cold! It is worth the wait.
I love this specific peach pie in all its honey, ginger, and lime glory. But because this is Pie 101, it’s less about that specific pie and more about how you can apply everything you’ve learned to other pies, so you know there are plenty of substitutions for you.
Because the crust is neutral (not too savory, not too sweet), I use it as the base for all my galettes, pies, hand pies, etc. It’s just as good as the base of a galette filled with cheese, eggs, and kale as it is an apple pie.
Apple cider vinegar is the default for the crust, but you could also go with white wine vinegar or white distilled vinegar. It’s more about adding the acidity than the flavor.
For the filling, the ratios in this recipe are best suited for stone fruit (peaches, nectarines, apricots, plums) or tree-fruit (apples, pears) pies. You’ll need a thickener (we use corn starch here, but you could also use more flour, tapioca starch, or potato starch), a sweetener (here it’s honey and sugar, but you could also just use sugar, brown sugar, or maple syrup), and acidity (vinegar, lime, or lemon juice).
If you’re making this pie and can’t find fresh ginger, just leave it out. Ground ginger doesn’t have the same effect.
Always adjust to the sweetness of your fruit. Taste it after the filling has been mixed and adjust the acidity or sweetness if needed.
If you want to get more decorative with your pie, absolutely go for it! This one has a more rustic, simple look which is purely personal preference, and this method for crimping and venting is simply a baseline for ensuring everything works the way it should when you put it in the oven.
Demerara sugar/ sugar in the raw is great for extra texture, but granulated sugar is also nice to finish with,
One more time because it simply cannot be overstated: bake your pie for longer than you think, until it’s deeply golden, and then cool it for—brace yourself—6 to 8 hours to avoid any soupy filling.
Click HERE for a printable PDF.
double-crust peach pie with honey, ginger, and lime
serves 8
Unless you’re from a place with notoriously lovely peaches, you might find yourself wondering why peaches are never terrible but rarely magnificent. Well, don’t feel too bad, because when baked into a buttery crust along with fresh ginger, tangy lime juice, and the most flavorful honey you can find, any peach from any place can be magnificent.
1 recipe (2 disks) The Only Piecrust
All-purpose flour, for rolling
1 large egg, beaten
4 pounds ripe peaches, unpeeled, pitted and sliced ½ inch thick (10 to 12 cups)
⅓ cup mild honey
¼ cup granulated sugar
1 tablespoon lime zest
¼ cup fresh lime juice
3 tablespoons cornstarch
1 tablespoon finely grated fresh ginger
Pinch of kosher salt
½ cup Demerara sugar
1. Preheat the oven to 375°F. Line a baking sheet with parchment paper.
2. On a lightly floured surface, roll out one disk of pie dough into a round about 14 inches in diameter. Transfer it to the parchment-lined baking sheet and repeat with the remaining disk of dough, separating the two rounds with a piece of parchment to make it easier to separate them. Pop the baking sheet in the refrigerator while you make the filling.
3. Beat the egg with 1 teaspoon water and set aside (this is your egg wash, and it will help seal the pie and make it golden brown on top).
4. In a large bowl, toss the peaches, honey, granulated sugar, lime zest, lime juice, cornstarch, ginger, and salt together. Toss a few times to break up any clumps of cornstarch.
5. Transfer one round of pie dough to a 9-inch pie plate, letting it slump in the center with an even distribution of crust around the edges. Using your fingers, encourage the crust to fit snugly against the pie dish. Add the filling, letting it sort of mound in the center (it’ll distribute evenly as it bakes). Brush the edges of the pie dough with the egg wash. Place the remaining round of pie dough over the peaches (the crust will be full, and that’s okay) and, using your fingers, press the dough together around the edges to seal.
6. From here, you can crimp the edge any way you like. I am into the very low-maintenance version where you simply crimp with the tines of a fork (think: Pop-Tarts), then trim any excess overhang with kitchen shears. Make a few 3-inch slits in the top to allow moisture and steam to escape as the pie bakes. This is a necessary step that allows the filling to thicken properly, as well as ensures a flaky, crunchy crust.
7. Brush the top with the egg wash and sprinkle with the Demerara sugar. Place the pie on a parchment- or foil-lined baking sheet and bake for at least 60 minutes before you even think about checking on it. I’m serious. Pies take a really long time to bake, much longer than most people actually keep them in the oven. I sound like a broken record over here, but I feel very passionately about this and need my voice to be heard.
8. After about an hour, rotate the pie; it’ll likely need another 30 to 45 in there. Yes, I am serious!
9. The piecrust should be the color of a perfect croissant all over—dangerously golden, almost to the brink of “Is my pie burned?” (No.) If the edges start to get too dark for your liking before the top is ready, place thin strips of foil over the parts that are getting too far ahead of the game.
10. Remove the pie from the oven and let it cool completely before eating. To me, that means about 4 hours, but people get really upset when you tell them they should wait that long, so do what you please.
the only pie crust
makes 2 disks, enough for 1 double-crust pie, 2 galettes, or 12 hand pies
I think I am a good pie maker, but not necessarily a great one. To be a truly great pie maker—as opposed to a master of all other types of desserts and pastries—you have to make many pies every day for a very long time, because making pie dough is a very sensitive process. It’s mostly about touch and trust.
Touch, as in how you handle the dough: Rough at first, to smash the butter quickly so it never softens, flattening the chunks, creating layers like a cheater ’s pu! pastry. Then gentle, working the water in at the end with your hands until it’s just absorbed and maybe even still looks too dry (it’s not). Trust, as in trusting that, yes, all that butter will fit into the flour, and no, you don’t need more water than that.
Because it’s such a tactile process, I always prefer to make my dough by hand, never in the food processor. When you feel the butter smash into the flour, then the water hydrate the flour, you’re much more connected to and in charge of the outcome, fully understanding what it means to need a few more teaspoons of water or a light dusting of flour.
Each time I make a crust, it’s never the same, but I guess that’s why I love making pie. I feel like I’m not really perfect at it yet, so each time is a true chance to do better, which means every time I make a pie I am entering a competition with myself (which is fun for me, I promise). I want to get the dough flakier, to roll it in a more perfect circle, to crimp it in a newer, fancier way. If you don’t have the time to quit your job and start making pies every day, beginning with a great pie dough recipe will help.
2 ½ cups all-purpose flour, plus more for rolling
2 teaspoons sugar
1 teaspoon kosher salt
1 ¼ cups (2 ½ sticks) unsalted butter, cut into 1-inch pieces, chilled
1 tablespoon apple cider vinegar or white distilled vinegar
¼ cup ice water
1. In a large bowl, whisk the flour, sugar, and salt together. Add the butter and toss to coat it in the flour mixture. Using your hands, smash the butter between your palms and fingertips, mixing it into the flour, creating long, thin, flaky, floury, buttery bits. Once most of the butter is incorporated and there are no large chunks remaining, dump the flour mixture onto a work surface.
2. Combine the vinegar with the ice water and drizzle it over the flour-butter mixture. Run your fingers through the mixture like you’re running your fingers through your hair, just to evenly distribute the water through the flour until the dough starts coming together.
3. Knead the dough a few more times, just to gather up any dry bits from the bottom and place them on the top to be incorporated. Once you’ve got a shaggy mass of dough (it will not be smooth and it certainly will not be shiny), knead it once or twice more and divide it in half. Pat each piece into a flat disk, about 1 inch thick. Wrap each disk individually in plastic wrap and refrigerate for at least 2 hours.











I’ve only ever loved crumb topping, I’ve always ignored every cook’s double crust recipes, but THIS…only AR can convince me of a double crust. Why not, of course, definitely! It was glistening! (I think it’s because it’s the first time I’ve seen a recipe with sugar sprinkled all over. That is a YES) And I’m all for baking it darker than we’re used to. Why did we ever never do that
I am going to go ahead and vouch for this pie crust, having made it several times. It is truly the ONLY pie crust.